Water Damage Mitigation: 7 Proven Steps to Protect Your Home and Prevent Costly Repairs
Water can cause serious problems inside a home long before major structural damage becomes visible. A burst pipe, leaking appliance, overflowing bathtub, roof leak, or severe storm can introduce moisture into flooring, drywall, insulation, and other building materials. When these situations occur, professional water damage mitigation helps control the immediate problem, remove unwanted moisture, protect affected materials, and reduce the risk of additional damage.
The first hours after a water emergency are particularly important. Water can travel beneath flooring, enter wall cavities, and remain trapped in areas that appear completely dry. Without an appropriate response, moisture may contribute to damaged building materials, microbial growth, and expensive restoration work.
According to the US Environmental Protection Agency, wet materials should generally be dried within 24 to 48 hours whenever possible to reduce the likelihood of mold growth. However, this is not a guaranteed safe window, and cleanup should begin as soon as conditions allow.
Understanding how the mitigation process works allows homeowners to make informed decisions, recognize potential hazards, and protect their properties more effectively.
What Is Water Damage Mitigation?
Water damage mitigation is the process of controlling an existing water emergency and limiting the additional damage it may cause.
Rather than focusing immediately on cosmetic repairs, mitigation professionals address the conditions responsible for continuing deterioration.
This usually involves identifying the water source, evaluating safety hazards, removing excess water, inspecting affected materials, and beginning controlled drying procedures.
The objective is to stabilize the building so that appropriate cleaning, repairs, and reconstruction can follow.
Water Damage Mitigation vs. Water Damage Restoration
Although these terms are frequently used together, they describe different stages of property recovery.
Water damage mitigation concentrates on preventing further harm.
Typical mitigation activities include water extraction, moisture detection, temporary protection, controlled drying, and removal of materials that cannot be safely restored.
Water damage restoration focuses on repairing or replacing damaged components and returning the property to an acceptable condition.
Restoration work may involve installing new drywall, repairing flooring, repainting walls, rebuilding cabinetry, or completing structural repairs.
The two processes often overlap, particularly when one company manages the entire project.
Why Immediate Water Mitigation Matters
Water rarely remains confined to the exact location where a leak occurs.
It can travel along building materials, pass through joints, and accumulate beneath visible surfaces.
For example, a dishwasher supply line leak may initially appear to affect only a small kitchen area.
However, moisture could spread beneath cabinets and flooring or enter an adjoining room.
Early detection and effective drying may help preserve materials that would otherwise require replacement.
1. Identify and Stop the Water Source Immediately
The first priority during any water damage emergency is identifying the source of the unwanted water.
Removing standing water without correcting an active leak will not resolve the underlying problem.
In some situations, the cause is obvious. A broken washing machine hose may release water across a laundry room, or an overflowing sink may flood a bathroom.
Other incidents are less straightforward.
A concealed plumbing leak could remain unnoticed for several days before discoloration or dampness appears on an interior wall.
Common Causes of Residential Water Damage
Homes experience water-related damage for numerous reasons, including:
- Burst or leaking plumbing pipes
- Faulty washing machine supply hoses
- Dishwasher and refrigerator water line failures
- Overflowing sinks, toilets, and bathtubs
- Damaged roofing and flashing
- Heavy rainfall and surface flooding
- Blocked drainage systems
- Malfunctioning water heaters
- Air conditioning condensate leaks
- Foundation seepage and basement water intrusion
Each situation requires an appropriate response based on the water source and potential hazards.
Shut Off the Water Supply When Safe
For an indoor plumbing emergency, shutting off the relevant fixture valve or main water supply can prevent additional water from entering the property.
However, homeowners should not enter standing water or approach potentially energized equipment to reach a valve.
When electricity, structural damage, or other hazards are suspected, contact the appropriate emergency service or qualified professional.
Address the Root Cause
Drying affected materials is only one part of a successful response.
If a roof continues leaking or a plumbing connection remains defective, the property may become wet again.
Mitigation and permanent repairs should therefore be coordinated to ensure the original moisture problem is fully resolved.
2. Prioritize Safety Before Beginning Water Damage Mitigation
A flooded room can contain hazards that are not immediately visible.
Water may come into contact with electrical systems, contaminated materials, damaged building components, or hazardous substances.
Homeowners should never assume a room is safe simply because the water appears shallow or clear.
Check for Electrical Hazards
Water and electricity create a potentially life-threatening combination.
Do not touch wet appliances, electrical outlets, wiring, or equipment.
Never enter standing water to unplug an appliance or operate a circuit breaker.
If the electrical system may have been affected, stay away from the area and arrange for power to be disconnected safely by the utility or a qualified electrician.
Power should not be restored to damaged electrical equipment until it has been properly evaluated.
Understand Water Contamination Risks
Not every water emergency involves water that is safe to handle.
Restoration professionals evaluate water according to its source, contamination potential, and the conditions encountered.
Clean water originating from a plumbing supply line may pose fewer immediate contamination concerns than sewage or floodwater.
However, water can become contaminated as it moves through building materials or remains in an affected area.
Sewage backups and external floodwater require especially careful handling.
When Professional Cleanup Is Essential
Professional assistance is particularly important when water may contain sewage, industrial chemicals, or other harmful substances.
Flooded spaces may also contain biological contaminants and hidden physical hazards.
Children, people with respiratory conditions, and individuals with weakened immune systems may need additional precautions.
Avoid entering visibly contaminated or structurally unsafe areas.
Use Appropriate Protective Equipment
Cleanup personnel may require waterproof gloves, protective footwear, eye protection, and suitable respiratory protection depending on the hazards.
The necessary equipment varies with contamination, material disturbance, and mold conditions.
Protective equipment does not make an electrically hazardous or structurally unstable space safe to enter.
3. Remove Standing Water and Control Moisture
After the water source has been addressed and the area is confirmed safe, water removal becomes a major priority.
The amount of water present determines which equipment and procedures are appropriate.
Small, isolated clean-water spills may be manageable using household cleaning materials.
Larger incidents often require specialized extraction equipment.
Professional Water Extraction Equipment
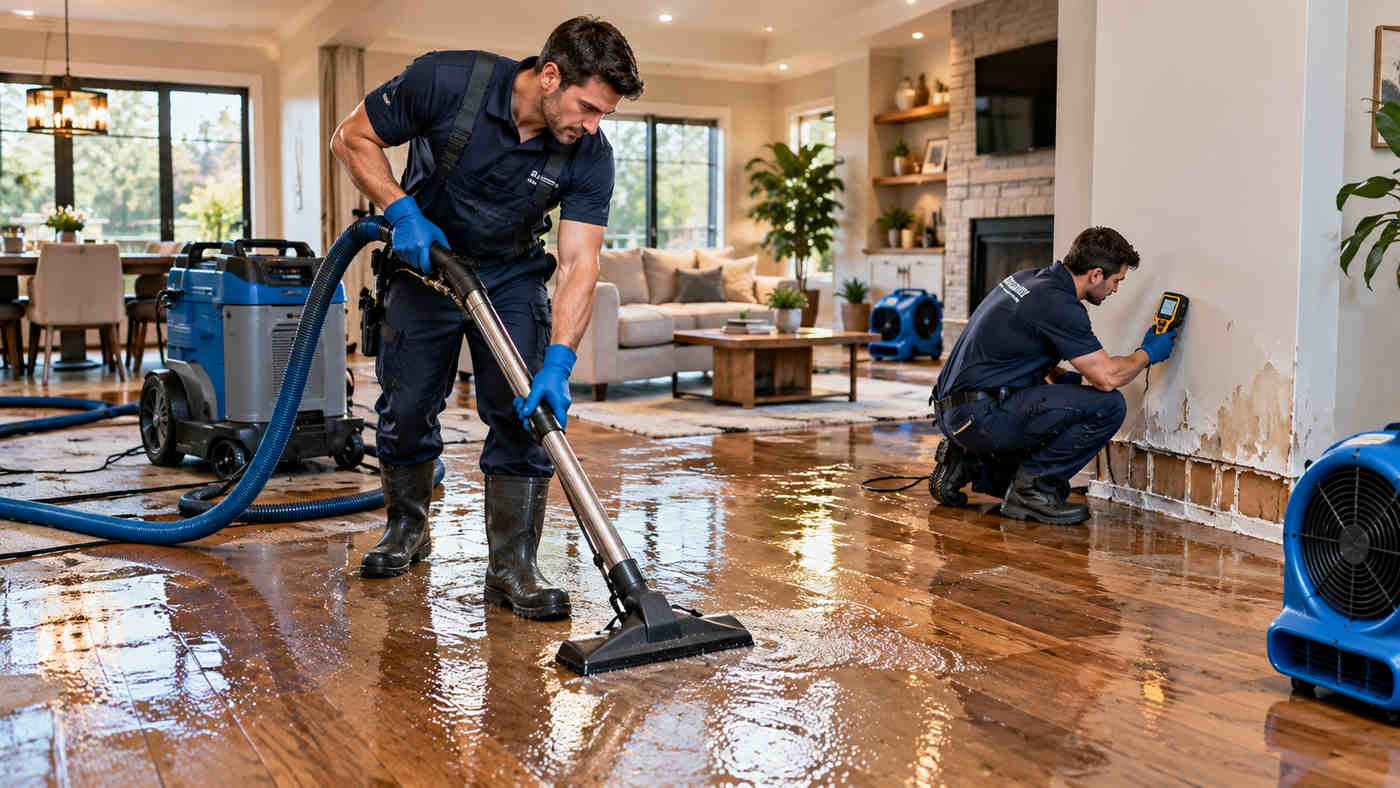
Restoration contractors commonly use commercial extraction systems designed to remove water from floors and other affected surfaces.
Depending on the situation, equipment may include:
- Commercial wet extraction vacuums
- Portable water extraction systems
- Truck-mounted extraction equipment
- Submersible pumps
- Specialized flooring extraction tools
- Moisture detection instruments
The equipment selected depends on the amount of water, the materials affected, accessibility, and contamination conditions.
Why Household Vacuum Cleaners Are Not Suitable
Ordinary household vacuum cleaners are not designed to collect standing water.
Using one to remove liquid can create an electrical hazard and damage the appliance.
Only equipment specifically designed for wet extraction should be used, and only where electrical conditions are safe.
Remove Water From Hidden Areas
Visible water extraction does not necessarily mean the property is dry.
Water can become trapped beneath laminate flooring, inside wall cavities, under cabinets, and within insulation.
These spaces may retain moisture even when surrounding surfaces appear normal.
Professional moisture assessment helps determine whether further access, drying, or material removal is necessary.
Special Considerations for Different Flooring Materials
Hardwood flooring may absorb moisture and experience swelling, cupping, or distortion.
Laminate flooring can deteriorate when water enters its engineered core.
Carpet and underlying padding may retain significant moisture.
Some materials can be successfully dried under suitable conditions, while others may require replacement.
The decision should consider the water source, duration of exposure, material condition, and measurable drying progress.
4. Inspect Hidden Moisture and Evaluate Structural Materials
An effective mitigation project requires more than removing puddles and operating drying equipment.
Water frequently moves into building assemblies where moisture cannot be identified through ordinary visual inspection.
This creates a risk of incomplete drying.
How Professionals Detect Hidden Moisture
Qualified restoration technicians use several methods to evaluate affected areas.
Moisture meters help assess moisture conditions in particular materials.
Thermal imaging cameras may identify temperature patterns suggesting the presence of moisture, but temperature differences alone do not confirm water damage.
Thermal findings should be supported by appropriate moisture measurements and physical inspection.
Technicians may also assess indoor temperature, relative humidity, and other environmental conditions.
Materials That Commonly Retain Moisture
Some building materials are especially vulnerable to prolonged water exposure.
These include drywall, insulation, carpet padding, wood-based flooring, and certain composite materials.
Waterlogged insulation may lose performance and can be difficult to dry effectively.
Drywall can soften, swell, or deteriorate depending on the amount of water absorbed and the contamination involved.
Porous materials affected by sewage or floodwater may need to be discarded because thorough cleaning can be difficult or impractical.
Why Moisture Mapping Matters
Moisture mapping involves documenting which parts of a property have been affected.
It helps establish the extent of damage and provides a basis for planning drying activities.
During mitigation, technicians can repeat measurements to determine whether conditions are improving.
This approach is more reliable than relying only on how walls or flooring feel to the touch.
Protect Structural Integrity
Significant water exposure may weaken certain building components.
Sagging ceilings, unstable floors, and visibly damaged framing require careful assessment.
Where structural problems are suspected, the affected area should remain off-limits until a qualified professional evaluates it.
5. Begin Professional Drying and Dehumidification
Structural drying is among the most important stages of water damage mitigation.
Although visible standing water can sometimes be removed relatively quickly, absorbed moisture may remain in building materials.
Drying requires suitable environmental conditions and ongoing monitoring.
How Air Movers Help Dry Materials
Professional air movers create airflow across wet surfaces.
This encourages evaporation by moving moisture away from the surface of affected materials.
However, air movement must be appropriate to the circumstances.
Fans should not be used indiscriminately where sewage contamination, significant mold growth, or other hazards could be spread.
In those situations, cleaning, containment, and specialist assessment may be necessary before ordinary drying methods are introduced.
The Role of Commercial Dehumidifiers
As water evaporates from wet materials, it enters the surrounding air as water vapour.
Dehumidifiers help remove that moisture.
Without adequate humidity control, drying may become less effective, particularly in enclosed spaces.
Professional drying plans coordinate air movement, dehumidification, and appropriate temperature conditions.
Why Controlled Drying Is Better Than Guesswork
Excessive or poorly managed drying conditions can damage certain materials.
Wood flooring, for example, may react poorly to aggressive changes in moisture conditions.
A professional approach considers the specific material, its initial moisture level, and its response during drying.
Monitoring Drying Progress
Technicians typically take moisture readings throughout the process.
These readings help determine whether the affected materials are approaching appropriate drying goals.
The duration cannot be guaranteed in advance because it depends on material type, moisture levels, environmental conditions, and the extent of damage.
6. Prevent Mold Growth and Address Contaminated Materials
Mold prevention is a major concern after water intrusion.
Indoor mold growth is strongly associated with uncontrolled moisture.
Once suitable moisture conditions exist, mold can develop on susceptible materials such as drywall paper, wood, carpeting, and stored belongings.
The EPA emphasizes that moisture control is central to preventing mold problems.
Why the First 24 to 48 Hours Matter
Drying wet areas and materials within 24 to 48 hours can substantially reduce the likelihood of mold growth in many situations.
However, this recommendation is not a promise that mold cannot appear sooner or that all materials become safe after a particular period.
Temperature, humidity, contamination, and material properties influence microbial development.
Acting promptly is therefore more useful than waiting until the end of a supposed deadline.
Recognize Possible Signs of Mold
Potential indicators include musty odours, visible spotting, persistent dampness, and recurring discoloration.
However, not all staining is mold, and microbial growth may occur in concealed areas.
Professional assessment may be appropriate when moisture has remained trapped or significant contamination is suspected.
Cleaning vs. Replacing Damaged Materials
The appropriate treatment depends on the affected material and contamination conditions.
Some nonporous surfaces can be cleaned and dried effectively.
Porous materials that cannot be thoroughly cleaned or dried may need to be removed.
For example, certain water-damaged ceiling tiles, insulation, and carpet padding may be unsuitable for reuse.
Any removal process should account for the possibility of spreading contaminants into unaffected spaces.
Avoid Common Mold Cleanup Mistakes
Painting over visible mold does not solve the underlying moisture problem.
Likewise, using a deodorizing product cannot replace proper cleaning and drying.
Bleach and ammonia should never be mixed because the combination can produce dangerous gases.
When mold contamination is extensive or associated with major water damage, professional remediation is generally the safer approach.
7. Document Damage and Plan the Restoration Process
Once immediate hazards are controlled, property owners should begin organizing the information needed for repairs and potential insurance claims.
Accurate documentation can simplify communication with restoration professionals and insurers.
Photograph the Damage Before Cleanup
If it is safe to do so, take photographs or videos showing affected rooms, damaged belongings, visible water levels, and the apparent source of the incident.
Documentation should occur before significant removal or disposal whenever practical.
However, property owners should not delay urgent safety measures or necessary mitigation simply to collect additional photographs.
Contact Your Insurance Company Promptly
Insurance coverage depends on the policy language, the cause of the water intrusion, applicable exclusions, and any endorsements.
For example, some policies may provide coverage for sudden accidental plumbing damage while excluding certain flooding or long-term maintenance-related losses.
In the United States, external flooding typically requires separate flood insurance rather than ordinary homeowners coverage.
Homeowners should review their own policies and confirm the relevant requirements with their insurers.
Maintain Clear Restoration Records
Useful records include:
- Photographs of affected areas and belongings
- Initial inspection findings
- Moisture readings and drying documentation
- Contractor estimates and invoices
- Equipment rental or service receipts
- Communications with insurance representatives
- Written approvals for additional work
Organized documentation helps explain which services were performed and why they were necessary.
Coordinate Reconstruction After Drying
Damaged surfaces should not be covered or rebuilt before the underlying moisture problems have been resolved.
Installing new drywall over wet framing, for example, may conceal ongoing problems.
The restoration phase should begin only after appropriate cleaning, drying verification, and required repairs are complete.
How Long Does Water Damage Mitigation Take?
The duration of a mitigation project varies significantly.
A small clean-water leak discovered immediately may require relatively limited extraction and drying.
A flooded basement or multi-room incident may involve extensive material removal, specialized drying, cleaning, and repairs.
Factors That Affect the Timeline
The amount of water is only one consideration.
Other factors include the duration of exposure, the materials affected, the source of contamination, and how far water has migrated into the building.
Environmental conditions also affect drying performance.
In addition, delays caused by access limitations, electrical hazards, or required inspections may influence the overall schedule.
Does Drying Always Finish Within 48 Hours?
No.
The 24-to-48-hour guidance relates to reducing mold risk by acting quickly.
It is not a guarantee that structural drying will be completed within two days.
Some assemblies require a longer monitored drying period.
Professionals should determine completion using appropriate measurements and material conditions rather than an arbitrary deadline.
What Does Professional Water Damage Mitigation Cost?
Mitigation costs depend on the extent of damage and the services required.
A small water extraction project may involve relatively little equipment and labour.
A major water emergency can require multiple technicians, extensive extraction, specialized cleaning, controlled demolition, and several days of drying.
Major Cost Factors
Important cost considerations include the affected floor area, water contamination, number of damaged rooms, accessibility, equipment requirements, and duration of the response.
The need to remove drywall, insulation, flooring, or cabinetry can also affect the total expense.
Emergency response outside normal working hours may involve additional charges.
Request an Itemized Estimate
An itemized estimate allows homeowners to understand the proposed services.
It should explain the work to be performed, major equipment charges, material removal, and any anticipated additional services.
If the damage is extensive, photographs and moisture documentation can help support the proposed scope.
Property owners should clarify how additional costs will be approved before work proceeds.
Why the Cheapest Estimate Is Not Always Best
An inexpensive estimate may exclude important moisture assessment or drying verification.
Incomplete mitigation can create additional problems after cosmetic repairs are finished.
The best value usually comes from an appropriately scoped response supported by transparent pricing and measurable results.
When Should You Hire a Professional Water Damage Mitigation Company?
Not every water spill requires a restoration company.
A small amount of clean water on a sealed, nonporous surface may be managed through prompt, safe cleanup.
However, professional support is advisable when the damage extends beyond a simple surface spill.
Significant warning signs include standing water across multiple rooms, wet drywall, persistent moisture beneath flooring, sewage involvement, or uncertainty about the source.
Specialist help is also important when electrical hazards, structural concerns, or substantial mold contamination are present.
What to Look for in a Mitigation Contractor
A reputable provider should be able to explain its assessment process, safety procedures, and drying strategy.
Ask about relevant training, insurance coverage, equipment, and experience with comparable incidents.
The Institute of Inspection, Cleaning and Restoration Certification publishes the ANSI/IICRC S500 Standard for Professional Water Damage Restoration, which provides a recognized professional framework for restoration procedures.
Working with professionals familiar with relevant industry standards can support a more systematic approach.
Questions to Ask Before Hiring
Ask how the company will identify hidden moisture, determine whether materials are salvageable, document drying progress, and establish completion criteria.
Also clarify whether the company handles reconstruction or only emergency mitigation.
Written explanations and clear communication help homeowners understand what they are purchasing.
Common Water Damage Mitigation Mistakes Homeowners Should Avoid
Property owners sometimes make well-intentioned decisions that complicate recovery.
One common mistake is assuming that removing visible water means the building has been completely dried.
Another is replacing damaged flooring before checking the condition of the subfloor.
Some homeowners attempt to cover water stains with paint without investigating the moisture source.
Others operate fans in areas affected by suspected sewage or substantial mold, potentially spreading contamination.
Delaying action while waiting for an insurance inspection can also allow preventable damage to continue.
Finally, discarding damaged belongings without keeping photographs and records may complicate later insurance discussions.
Avoiding these mistakes can support safer cleanup, better documentation, and more effective restoration.
How to Prevent Future Water Damage in Your Home
Preventive maintenance can reduce the likelihood and severity of many common water incidents.
Although floods and unexpected equipment failures cannot always be prevented, homeowners can address several manageable risk factors.
Inspect Plumbing and Household Appliances
Check visible plumbing connections for corrosion, moisture, or signs of leakage.
Washing machine hoses, dishwasher connections, and refrigerator supply lines deserve regular attention.
Replace deteriorating components and address small leaks before they develop into larger problems.
Maintain Roofing and Drainage Systems
Inspect roofing materials and flashing for obvious deterioration.
Keep gutters and downspouts clear so rainwater can drain away from the building.
Exterior grading should generally direct water away from the foundation.
Where drainage problems are persistent, professional assessment may be necessary.
Consider Water Leak Detection Technology
Modern leak detectors can identify moisture near appliances, water heaters, and plumbing fixtures.
Some systems provide smartphone notifications, while others can automatically close a compatible water supply valve.
These devices do not eliminate every water-related risk, but they may help reduce the duration of certain plumbing leaks.
Monitor Indoor Humidity
Excessive indoor humidity can contribute to condensation and moisture-related problems.
Ventilation, appropriate heating and cooling, and humidity control help maintain healthier indoor conditions.
The EPA recommends keeping indoor relative humidity below 60 percent where possible, ideally around 30 to 50 percent.
Homeowners should also investigate recurring condensation rather than treating it solely as a cosmetic concern.
Frequently Asked Questions
1. What is water damage mitigation?
Water damage mitigation is the process of controlling water intrusion, extracting excess water, assessing affected materials, and drying a property to minimize further damage.
2. How quickly should water damage mitigation begin?
Mitigation should begin as soon as it is safe. The EPA recommends drying wet materials within 24 to 48 hours when possible to reduce mold growth risks.
3. Can I handle water damage mitigation myself?
Small, clean-water spills may be manageable with appropriate precautions. Extensive flooding, sewage contamination, hidden moisture, and electrical hazards require professional assistance.
4. How long does professional water mitigation take?
The timeline depends on the severity of damage, affected materials, contamination, and drying conditions. Some projects require several days or longer to reach appropriate drying goals.
5. Does homeowners insurance cover water damage mitigation?
Coverage depends on the policy and cause of damage. Sudden accidental water incidents may be covered, while flooding and gradual leakage may be excluded or require separate coverage.
6. What happens after water damage mitigation is completed?
Once moisture problems are resolved and affected areas are appropriately dried and cleaned, restoration may begin. This can include replacing damaged drywall, repairing flooring, painting, and rebuilding affected spaces.
Conclusion
Effective water damage mitigation begins with a fast, safe response and continues through careful extraction, moisture assessment, controlled drying, and contamination management. Addressing the source of water and verifying drying progress are essential to preventing recurring problems.
Homeowners who understand these steps are better prepared to respond to emergencies, communicate with restoration professionals, and make informed repair decisions. With appropriate mitigation, documentation, and preventive maintenance, many properties can recover more effectively from unexpected water damage.