Sprinkler Leak Repair Made Simple: Find Leaks, Fix Problems, and Protect Your Landscape
Timely sprinkler leak repair can prevent unnecessary water use, reduce oversaturated areas in a landscape, and restore proper performance to an irrigation system. A leak may appear as a broken sprinkler head spraying water across a driveway, but other problems remain hidden underground near pipes, valves, fittings, or connections. Successful repair begins with finding the actual source instead of treating symptoms such as a wet lawn or low water pressure. This guide explains how to recognize irrigation leaks, identify common causes, determine which repairs may be suitable for homeowners, and know when professional irrigation or plumbing expertise is appropriate.
What Is Sprinkler Leak Repair?
Sprinkler leak repair is the process of locating and correcting unintended water loss from a landscape irrigation system. The work can involve replacing a damaged sprinkler head, repairing irrigation pipe, resealing an appropriate threaded connection, servicing a valve, or correcting another failed system component.
Because irrigation systems contain different zones and components, accurate diagnosis is essential. A puddle beside a sprinkler does not always mean the sprinkler head itself is defective.
Water can migrate underground from a damaged pipe or fitting and emerge some distance away.
Why Sprinkler Leak Repair Matters
Irrigation systems are intended to distribute water in controlled amounts. A leak disrupts that control.
Depending on its location and severity, leakage can contribute to:
• Unnecessary water consumption
• Uneven landscape irrigation
• Persistently wet soil
• Erosion around components
• Water flowing onto pavement
• Reduced performance within an irrigation zone
• Damage to landscaping
• Higher water bills in metered areas
Leaks near buildings can be particularly important because repeated water exposure may affect soil conditions or contribute to moisture around structures.
Is a Sprinkler Leak Always Obvious?
No. Some problems produce dramatic spraying or visible pooling, while slow underground leaks may be harder to recognize.
The symptoms also depend on whether the leak occurs upstream or downstream of a zone valve. Some parts of an irrigation system may remain pressurized even when watering is not actively scheduled.
Understanding when the leak appears can therefore provide useful diagnostic information.
7 Powerful Sprinkler Leak Repair Tips
Effective troubleshooting follows the irrigation system logically. These seven steps can help property owners isolate problems without replacing functioning components unnecessarily.
1. Confirm the Need for Sprinkler Leak Repair
Begin by determining whether the water is actually coming from the irrigation system.
Wet soil can have several causes, including rain, poor drainage, plumbing leaks, irrigation runoff, groundwater, or nearby landscape features.
Look for Common Sprinkler Leak Signs
Potential indicators include:
• Unexplained soggy areas
• Water bubbling from the soil
• A sprinkler continuing to leak after a zone stops
• Abnormally low spray from several heads
• Erosion around sprinkler components
• Water flowing onto sidewalks or driveways
• Unusual changes in metered water consumption
• A zone that performs differently from normal
One symptom alone may not identify the failed component, but it can indicate where investigation should begin.
Run Irrigation Zones Individually
If safe and practical, operate each zone separately using the controller’s manual function.
Observe how the heads rise, spray, retract, and stop. This can help determine whether the problem is isolated to one irrigation zone.
Record the Location Before Digging
Mark suspected leak locations while the zone is running, then shut the system down before excavation.
Photos or temporary landscape markers can help identify the area without leaving water running longer than necessary.
2. Inspect Sprinkler Heads Before Digging Up Pipes
Sprinkler heads are exposed to lawn equipment, vehicles, foot traffic, soil movement, and normal wear. They are therefore a logical place to begin an inspection.
Common visible issues include cracked housings, damaged nozzles, missing parts, tilted heads, and water escaping around unintended areas.
How to Check a Sprinkler Head
Operate the affected zone briefly and observe the head from a safe position.
Compare it with nearby heads of the same type. A significant difference in spray pattern or water emerging from the body can indicate damage.
Shut the irrigation water off appropriately before removing or replacing components.
Clean Before Replacing
Poor sprinkler performance is not always caused by a leak.
Soil or debris can sometimes obstruct nozzles or screens. Components designed to be serviced can be cleaned according to manufacturer instructions.
A physically cracked body, damaged connection, or failed internal component may require replacement.
Use Compatible Replacement Parts
Sprinkler heads differ in inlet size, operating characteristics, spray pattern, precipitation rate, and pressure requirements.
Replacement equipment should be compatible with the irrigation design. Installing a head with substantially different output can create uneven watering even when the leak is fixed.
3. Find Underground Pipe Leaks Accurately
When visible heads appear sound but the ground becomes saturated whenever a particular zone operates, an underground lateral pipe or fitting may be damaged.
Potential causes include roots, excavation, freeze related damage, aging components, soil movement, or accidental impact during landscaping.
Locate the Suspected Pipe
Irrigation plans can be helpful if they are available.
Without documentation, sprinkler locations can sometimes provide clues to pipe routing, but systems do not always follow an obvious straight path.
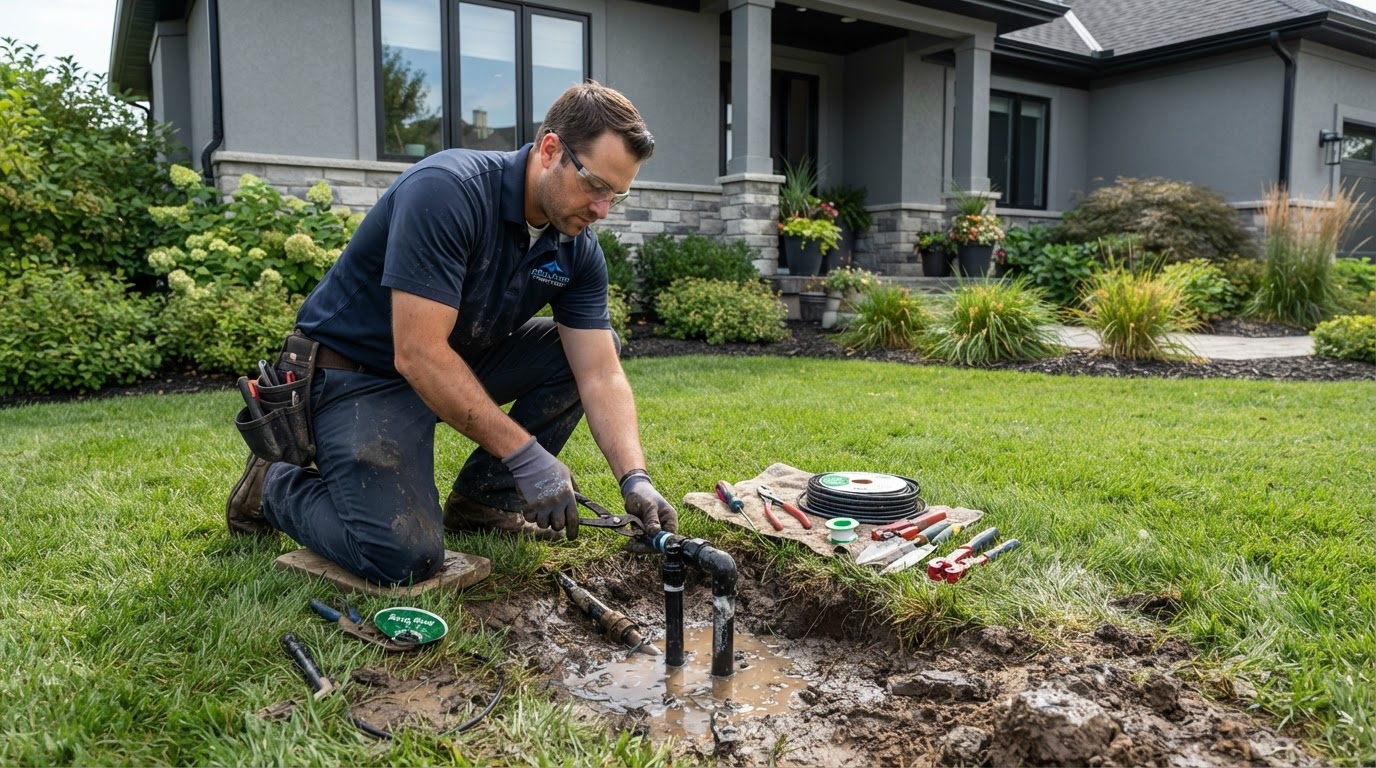
Excavate carefully to avoid creating additional damage.
Dig Carefully Around Irrigation Components
Before digging, consider what other buried utilities may be present.
In the United States, homeowners should use the applicable utility notification process, commonly accessed by calling 811, before excavation where required. Private irrigation lines generally are not the same as utility owned lines and may require separate locating methods.
Use hand digging carefully when approaching suspected irrigation lines.
Expose Enough Pipe for a Reliable Repair
A very small hole may not provide enough room to clean, cut, align, and reconnect the pipe correctly.
Expose an adequate working area without placing unnecessary stress on nearby fittings.
Remove loose dirt and water around the repair location so contamination does not interfere with applicable joining methods.
4. Match Sprinkler Leak Repair to the Pipe Material
Irrigation systems can use PVC, polyethylene, flexible pipe, or other approved materials depending on region and system design.
The correct repair method depends on the material.
Repairing PVC Irrigation Pipe
Damaged PVC may require the affected section to be cut out and replaced using compatible fittings and solvent cement procedures.
Proper preparation is important. Pipe ends should be cut and prepared according to the fitting and cement manufacturer’s instructions.
Cure requirements vary by product, pipe size, temperature, and pressure conditions.
Do Not Turn Water Back On Too Early
Solvent welded PVC joints need appropriate cure time before they are pressurized.
Follow the solvent cement manufacturer’s instructions rather than using a universal waiting period. Pressurizing too early can compromise a repair.
Repairing Polyethylene Irrigation Pipe
Polyethylene systems often use fittings specifically designed for the pipe type and dimensions.
Repair procedures can involve insert fittings and appropriate clamps or other manufacturer approved components.
Compatibility matters because visually similar irrigation products may have different dimensions or pressure ratings.
Avoid Improvised Repair Materials
Household tape, general purpose adhesive, or an unsuitable clamp may temporarily reduce visible leakage but should not be treated as a permanent pressurized irrigation repair.
Use products rated and intended for the pipe material and application.
5. Check Irrigation Valves During Sprinkler Leak Repair
Zone valves control water flow to different portions of an irrigation system. A valve that fails to close correctly can create symptoms that resemble other types of leakage.
One common symptom is continued low level water discharge from the lowest sprinkler head after the scheduled irrigation period.
Understand Low Head Drainage
Water emerging from a low sprinkler after a zone turns off does not automatically mean the valve has failed.
Water remaining in lateral piping can drain through the lowest head due to gravity. This is often called low head drainage.
If the flow stops after the pipes empty, drainage may be the explanation rather than a continuously leaking valve.
When a Valve May Be the Problem
A valve deserves investigation when water continues flowing instead of gradually stopping, particularly when the affected zone remains wet while it should be off.
Debris, diaphragm problems, damaged components, or valve control issues can contribute to improper operation.
The exact repair process depends on the valve design.
Shut Off Water Before Valve Service
Irrigation valve boxes can contain pressurized components and wiring associated with system controls.
Isolate water and electrical control as appropriate before disassembly. If the valve’s location or system design is unclear, professional diagnosis may be safer than exploratory disassembly.
6. Test Sprinkler Leak Repair Before Backfilling
A repair that looks correct when dry can still leak after pressure is restored.
Testing before replacing soil makes it easier to correct a problem without excavating the location twice.
Restore Water According to Repair Requirements
After any required cure time has passed, restore water as appropriate and operate the affected zone.
Look closely for seepage around repaired connections. Also inspect nearby components because more than one failure can occur in the same area.
Observe Overall Zone Performance
Repairing a major leak can change the apparent behavior of other sprinklers because more flow becomes available to the rest of the zone.
Check that heads rise correctly and distribute water as intended.
This is also a good opportunity to identify misaligned nozzles, clogged components, or landscape changes affecting coverage.
Backfill Carefully
Once the repair has been confirmed, replace excavated soil carefully.
Support pipe as appropriate and avoid placing sharp rocks directly against components when they could contribute to damage.
Sprinkler heads should finish at an appropriate elevation for the landscape and manufacturer installation requirements.
7. Prevent Future Sprinkler Leak Repair Problems
No irrigation system is maintenance free, but regular inspection can reveal damaged components before problems become more disruptive.
Seasonal startup is a particularly useful time to observe system performance.
Inspect the System Periodically
Operate each zone and look for:
• Broken heads
• Blocked spray
• Unusual bubbling
• Misaligned sprinklers
• Persistently wet areas
• Damaged valve boxes
• Water reaching pavement unnecessarily
• Plants blocking spray patterns
The appropriate inspection frequency depends on climate, landscape activity, and irrigation usage.
Protect Heads From Physical Damage
Sprinklers placed too high can be vulnerable to lawn mower blades, while improperly positioned equipment can also interfere with effective watering.
Use installation practices and protective arrangements suitable for the landscape without obstructing sprinkler operation.
Prepare for Freezing Conditions
Irrigation systems in freezing climates may require winterization.
Procedures depend on system design and local conditions. Compressed air blowout can be hazardous if performed incorrectly because the system and components may be exposed to pressure beyond their intended limits.
Where blowout winterization is required, use appropriate procedures and consider hiring an experienced irrigation professional.
How to Diagnose Sprinkler Leak Repair Problems by Symptoms
Symptoms can help narrow the search, but they should not be treated as definitive diagnoses.
A sprinkler spraying poorly could have a clogged nozzle, inadequate pressure, a leak elsewhere in the zone, or another hydraulic issue.
One Sprinkler Has Weak Spray
Inspect that individual sprinkler for debris, damage, an incorrect nozzle, or a local connection problem.
If neighboring heads work normally, the problem may be localized.
Every Sprinkler in One Zone Is Weak
When all heads in a zone perform poorly, consider issues affecting the whole zone.
Possible causes include a significant pipe leak, a partially operating valve, flow restrictions, pressure problems, or changes to the system.
Professional testing can be useful when no obvious leak is visible.
A Wet Spot Appears When Irrigation Is Off
Persistent wet soil deserves additional investigation.
If the affected irrigation line is normally downstream of a closed valve, water should not continuously flow through it unless water is entering from another source or the valve is not fully closing.
Plumbing leaks, drainage issues, groundwater, and other sources also need consideration.
Sprinkler Leak Repair Around the Main Line
The irrigation main line supplies water to zone valves and may remain under pressure depending on system design.
A main line leak can therefore behave differently from a leak in a lateral line that only receives water when a zone operates.
Signs of a Possible Main Line Leak
Possible indicators include continuous wetness independent of the watering schedule, water appearing near a supply route, or unexpected water consumption.
These symptoms are not unique to irrigation main lines, so diagnosis is still necessary.
Main Line Repairs Require Extra Care
Because the line can remain pressurized, water needs to be isolated appropriately before work begins.
The system may also include backflow prevention and other components subject to local plumbing or water authority requirements.
Do not alter regulated backflow devices without understanding applicable requirements.
Sprinkler Leak Repair and Backflow Prevention
Irrigation systems connected to potable water supplies commonly require backflow protection under applicable local regulations.
The purpose is to help prevent contaminated irrigation water from flowing backward into potable water piping.
Do Not Bypass a Backflow Device
A leaking backflow prevention assembly should not simply be removed or bypassed.
Requirements vary by jurisdiction and water supplier, and some devices require testing or servicing by certified individuals.
Contact the appropriate local authority or qualified professional when regulated equipment requires repair.
Protect Backflow Equipment From Freezing
Exposed assemblies can be vulnerable in freezing weather.
Winter protection must preserve proper device function and comply with local requirements. Improvised insulation should not interfere with vents, relief openings, drainage, or access where these are essential to the specific device.
Sprinkler Leak Repair Cost Factors
The price of repair varies too much to provide a reliable universal figure.
Replacing an accessible sprinkler nozzle differs substantially from locating and repairing an underground main line beneath complex landscaping.
What Affects Repair Cost?
Common factors include:
• Location of the leak
• Pipe material
• Depth and accessibility
• Number of failed components
• Valve condition
• Landscape restoration
• Diagnostic time
• Local labor rates
• Emergency service requirements
• Backflow related work
• Damage beneath hardscape
Request a written estimate when professional repair is required.
DIY Versus Professional Sprinkler Leak Repair
Simple component replacement may be manageable for homeowners familiar with their irrigation system.
Underground diagnostics, repeated leaks, main line failures, regulated backflow equipment, complex electrical controller issues, and repairs beneath structures are more suitable for experienced professionals.
Local licensing requirements may apply to certain irrigation or plumbing work.
Can Sprinkler Leaks Increase a Water Bill?
Yes. A leak supplied by metered water can increase consumption, although the amount depends on leak rate and how long water is flowing.
An unexpectedly high bill does not prove that irrigation is responsible. Indoor plumbing fixtures, supply piping, seasonal irrigation schedules, occupancy changes, and meter related factors may also influence usage.
Use the Water Meter as a Diagnostic Clue
Where appropriate, a water meter can sometimes help identify unexplained consumption.
Ensure that known water using fixtures and appliances are not operating before interpreting meter activity. Irrigation valves and automatic equipment should also be considered.
Meter designs vary, so consult the water provider’s instructions when using one for troubleshooting.
Compare Usage Over Time
Reviewing recent bills can help identify a change in consumption patterns.
Compare similar seasons rather than assuming month to month differences indicate leakage, since landscape irrigation naturally changes water demand throughout the year.
Smart Irrigation and Leak Detection
Modern irrigation controllers can adjust schedules using weather information, soil conditions, or other inputs depending on the system.
Some irrigation technologies can also monitor abnormal flow patterns when paired with compatible hardware.
Can Smart Controllers Detect Every Leak?
No. Capabilities vary, and not every controller measures actual water flow.
Some systems require a separate flow sensor to recognize unusual consumption. Even systems with leak alerts cannot necessarily determine the exact physical location of a failure.
Smart monitoring is useful as an additional detection tool rather than a substitute for system inspection.
Configure Alerts Correctly
Flow monitoring works best when equipment is installed and configured for the irrigation system.
Normal flow needs to be distinguishable from abnormal conditions. Review manufacturer instructions and verify that notifications are enabled if the system supports them.
Sprinkler Leak Repair and Landscape Protection
Finding a leak sometimes requires excavation, but careful planning can minimize landscape disturbance.
Mark the affected location accurately and remove turf carefully when practical.
Restore Soil After the Repair
After confirming the system is leak free, backfill and restore the area without damaging the new connection.
Soil that has become heavily saturated may need time to drain before normal conditions return.
Do Not Overwater a Recently Repaired Area
A previously leaking section may already contain excessive moisture.
Return irrigation scheduling to the actual needs of the landscape rather than compensating automatically with additional watering.
Plant requirements vary according to species, soil, weather, season, and local conditions.
Common Sprinkler Leak Repair Mistakes
Replacing the nearest visible sprinkler without confirming the source is a common troubleshooting error.
Another is burying a repaired connection before pressure testing it.
Using incompatible pipe, fittings, solvents, or clamps can also create repeat failures.
Avoid Excessive Excavation
Digging widely without first isolating the affected zone can cause unnecessary landscape damage.
Use zone testing, visible symptoms, irrigation plans, and careful excavation to narrow the search.
Never Ignore Recurring Leaks
Repeated breaks in the same location can suggest a larger problem, such as unsuitable installation, excessive pressure, root movement, freezing, or physical loading.
Instead of repeatedly repairing the same symptom, have the underlying cause evaluated.
Frequently Asked Questions
How do I know if I need sprinkler leak repair?
Soggy soil, bubbling water, weak sprinkler output, visible spraying from damaged parts, or unexplained irrigation related water use can indicate a leak.
Can I perform sprinkler leak repair myself?
Simple head or compatible pipe repairs may be manageable for experienced homeowners. Main lines, backflow devices, difficult diagnostics, and complex system problems may require a professional.
Why does a sprinkler leak after the system shuts off?
Brief leakage from a low head can result from water draining from lateral piping. Continuous flow may indicate a valve problem or another source requiring diagnosis.
How do I find an underground sprinkler leak?
Run irrigation zones separately, observe wet areas and pressure changes, mark suspected locations, and excavate carefully. Difficult hidden leaks may require professional locating equipment.
How much does sprinkler leak repair cost?
Cost depends on leak location, failed component, excavation, pipe type, landscape restoration, and local labor rates. An inspection is the best way to obtain reliable pricing.
Can sprinkler leak repair reduce water waste?
Yes. Correctly repairing unintended irrigation leakage prevents water from being lost through failed pipes, fittings, valves, or sprinkler components.
Conclusion
Effective sprinkler leak repair begins with accurate diagnosis, not unnecessary digging or random component replacement. Testing individual zones, inspecting sprinkler heads, understanding valves, using compatible repair materials, and pressure testing work before backfilling can resolve many irrigation problems efficiently. When a leak involves main lines, regulated backflow equipment, difficult underground diagnostics, or repeated failures, qualified professional service can provide a safer and more dependable solution.